Transform Travel Photos into Scroll-Stopping Posts with Instagram Post Makers
Travelers are natural storytellers. From capturing the turquoise waters of hidden beaches to sharing the vibrant chaos of local markets, every trip comes with moments worth remembering. In today’s social-first world, however, simply snapping a beautiful picture isn’t enough. The crowded Instagram feed demands posts that stand out, spark curiosity, and drive engagement.
That’s where smart editing and creative design tools come into play. By thoughtfully transforming your travel photos, you can elevate them from simple snapshots to scroll-stopping posts that captivate your audience and inspire wanderlust.
Why Travel Content Performs So Well on Instagram
Travel content consistently performs well on Instagram because it blends aspiration with emotion. People love to dream about their next getaway, discover unique places, and see destinations through someone else’s perspective.
But here’s the challenge: thousands of creators are posting travel content daily. To rise above the noise, you need more than just a pretty photo—you need storytelling, consistency, and design that matches your brand voice. Posts that combine these elements not only attract likes but also drive deeper engagement in the form of saves, shares, and comments.
The Role of Visual Storytelling
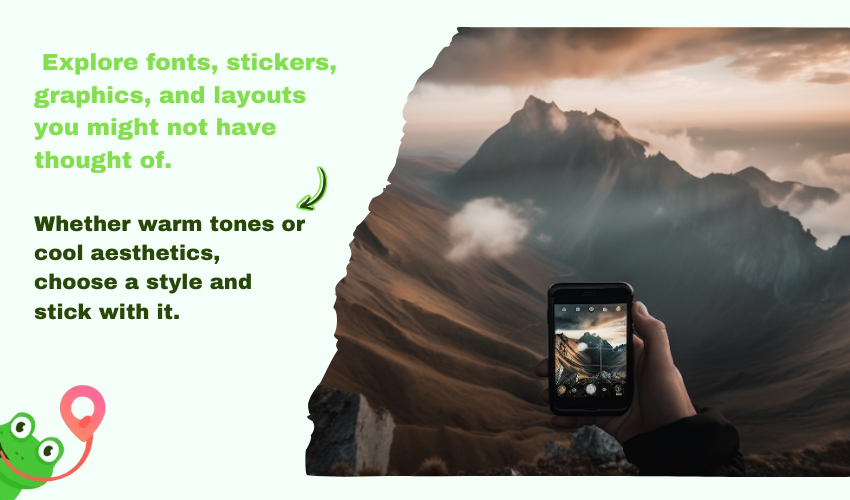
Every destination has its story, and photos are your canvas for sharing it. Think about the difference between a raw photo of a mountain versus a curated post with thoughtful edits, well-placed text, and consistent styling. The latter tells a story—it might highlight the challenge of the hike, the beauty of sunrise at the peak, or the feeling of accomplishment.
Visual storytelling is what transforms travel photos into experiences your followers want to be part of. And with the right tools, you can craft posts that make your audience stop scrolling, lean in, and feel connected.
Why You Should Use an Instagram Post Maker
Editing apps are abundant, but an Instagram post maker is specifically designed for creating polished, platform-ready content. Instead of juggling multiple tools for cropping, color grading, adding text, and aligning with Instagram’s size guidelines, these makers streamline the process with pre-built templates, drag-and-drop features, and design flexibility.
Here’s how they help:
- Save Time: Quickly turn raw travel photos into professional designs.
- Ensure Consistency: Maintain a cohesive aesthetic across your feed.
- Boost Creativity: Explore fonts, stickers, graphics, and layouts you might not have thought of.
- Stay On-Brand: Upload your brand colors, logos, or watermarks for a signature look.
For travel creators or businesses, these tools bridge the gap between raw photography and professional-level marketing.
Best Practices for Editing Travel Photos
Before diving into design tools, let’s cover some essential editing practices that help your photos shine:
- Focus on Lighting: Natural light is your best friend. Enhance brightness and contrast to make your shots pop without looking over-edited.
- Keep Colors Realistic: Saturation is tempting, but too much can make destinations look fake. Aim for natural yet vibrant tones.
- Highlight Details: Use selective edits to emphasize unique features like a café’s latte art or the intricate tiles of a cathedral.
- Crop with Intention: Frame your subject thoughtfully to guide the viewer’s eye.
- Stay Consistent: Whether warm tones or cool aesthetics, choose a style and stick with it.
Creative Ideas for Scroll-Stopping Posts
Once your photos are polished, it’s time to elevate them with design. Here are some creative ideas to make your posts more engaging:
- Before & After Posts: Show the raw shot versus the edited masterpiece.
- Photo Collages: Combine multiple angles of the same location into one cohesive layout.
- Travel Itinerary Posts: Overlay text that highlights your trip’s daily schedule.
- Quote Overlays: Pair a stunning landscape with an inspiring travel quote.
- Interactive Posts: Create graphics that encourage followers to comment, save, or share.
By experimenting with these ideas, you can present your photos in new ways that keep your audience engaged.
Tips for Using Instagram Post Makers Effectively
If you want your content to feel professional without losing its authenticity, keep these tips in mind:
- Choose Templates That Match Your Aesthetic: Don’t pick flashy designs if your brand is minimal and elegant.
- Limit Fonts: Stick to two complementary fonts—one for headlines, one for body text.
- Incorporate Branding Subtly: A logo or signature color palette should enhance, not dominate, your visuals.
- Balance Text with Imagery: Don’t overcrowd the photo; let the destination remain the star.
- Batch Create Content: Use the tool to design multiple posts at once, saving time while keeping your feed cohesive.
Top Instagram Post Makers for Travel Creators
If you’re ready to upgrade your travel photos, here are some top-rated tools to consider:
- Canva – User-friendly with thousands of Instagram-ready templates.
- Adobe Express – Professional-grade designs with advanced customization.
- Crello (VistaCreate) – Similar to Canva but with unique travel-focused layouts.
- Snappa – Great for quick posts with simple editing tools.
- Easil – Known for drag-and-drop functionality and team collaboration.
Each of these tools caters to different needs, so try a few and see which aligns best with your workflow and aesthetic.
How to Build a Cohesive Travel Feed
A single post may stop the scroll, but a cohesive feed makes people follow you. When designing posts:
- Stick to a Color Palette: Use consistent filters or tones across all photos.
- Plan Ahead: Use scheduling apps to preview your grid before posting.
- Mix Content Types: Alternate between landscapes, portraits, food shots, and text-based graphics for variety.
- Maintain Balance: Too many busy designs can overwhelm—pair bold posts with minimal ones.
Your feed should feel like a curated travel journal that invites followers to keep coming back for more.
Mistakes to Avoid
Even with great tools, some creators fall into common traps:
- Overdesigning: Too many stickers, effects, or fonts make posts look cluttered.
- Neglecting Authenticity: Over-editing can make destinations look unrecognizable.
- Ignoring Instagram Guidelines: Posts cropped incorrectly or with unreadable text won’t perform well.
- Inconsistency: Switching styles frequently confuses your audience.
Avoiding these pitfalls ensures your posts remain polished, professional, and true to your brand.
Optimizing Posts for Engagement
Finally, remember that beautiful posts are only half the equation—engagement drives visibility. To maximize results:
- Write Strong Captions: Tell the story behind the photo.
- Use Hashtags Wisely: Mix broad (#TravelGoals) and niche (#HiddenIceland).
- Post at Peak Times: Share content when your audience is most active.
- Encourage Saves and Shares: Include CTAs like “Save this for your next trip.”
- Engage Back: Reply to comments and interact with your followers.
When combined with stunning visuals, these strategies help your travel posts gain traction.
Final Thoughts
Travel photos are meant to inspire, and with the right approach, they can become more than just snapshots—they can be stories that transport your audience. By leveraging smart editing techniques, creative layouts, and the right design tools, you can turn your travel memories into scroll-stopping Instagram posts that leave a lasting impression.