How to Edit Your Travel Clips with Instagram Reel Makers
Travel is more than just visiting new places—it’s about sharing those unforgettable moments with others. In today’s social media-driven world, Instagram has become one of the most popular platforms for showcasing travel experiences. And while a beautiful picture might grab attention, short-form videos like Reels are what truly capture the energy, culture, and vibe of a destination.
If you’re looking to take your travel content to the next level, learning how to edit your clips with Instagram Reel makers is essential. This guide walks you through the process step-by-step, along with tips, tools, and strategies to create Reels that not only look professional but also tell a compelling story.
Why Reels Are Perfect for Travel Content
Instagram Reels have exploded in popularity because they combine creativity with visibility. Unlike static posts, Reels allow you to:
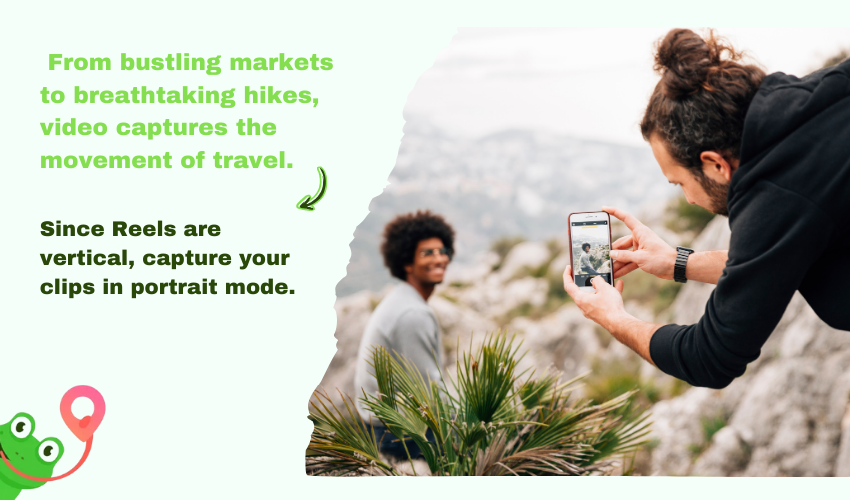
- Showcase Motion: From bustling markets to breathtaking hikes, video captures the movement of travel.
- Tell Stories Quickly: In 15–90 seconds, you can immerse viewers in a destination.
- Ride the Algorithm: Reels often get more reach than regular posts, putting your content in front of new audiences.
- Engage with Trends: Sounds, filters, and effects help your content feel fresh and relatable.
For travelers, this means your adventures can reach more people, inspire wanderlust, and even attract collaborations with tourism boards or brands.
Preparing Your Travel Clips Before Editing
Editing starts long before you open an app. The better your raw footage, the easier it will be to craft an engaging Reel.
- Shoot in Vertical Format: Since Reels are vertical, capture your clips in portrait mode.
- Focus on Lighting: Natural light, especially during golden hour, makes your shots instantly cinematic.
- Keep Clips Short: Record multiple quick snippets instead of one long video. This gives you more flexibility during editing.
- Capture Variety: Mix wide shots of landscapes with close-ups of food, architecture, or local details.
- Think About the Story: Even before editing, decide what your Reel will showcase—“A Day in Paris,” “Street Food Tour in Bangkok,” or “Top 3 Beaches in Greece.”
Choosing the Right Instagram Reel Maker
While Instagram has its own built-in editor, many creators prefer third-party tools because they offer more flexibility, templates, and creative effects. An Instagram reel maker simplifies the editing process, even for beginners, while providing professional-level results.
Some popular options include:
- InShot: Great for trimming clips, adding music, and creating smooth transitions.
- CapCut: Perfect for trendy effects, seamless transitions, and syncing clips to audio.
- Canva: Ideal for adding text overlays, templates, and branded elements to your travel videos.
- VN Video Editor: A powerful free tool with multi-layer editing for more complex Reels.
- Splice: Great for cinematic-style edits and advanced storytelling.
These tools allow you to craft polished, eye-catching Reels that stand out in a crowded feed.
Step-by-Step Guide to Editing Travel Clips
Here’s how to turn your raw travel footage into a scroll-stopping Reel:
1. Import Your Clips
Upload your favorite moments into your chosen editor. Start with more clips than you need—you can always cut later.
2. Trim and Arrange
Keep only the most dynamic moments. Arrange them in a sequence that tells a story—arrival, exploration, highlights, and finale.
3. Sync to Music
Choose a trending audio track from Instagram’s library or import your own. Align cuts with beats for a professional feel.
4. Add Text and Captions
Guide your audience with text overlays such as “Exploring Rome in 24 Hours” or “Hidden Gem Café in Kyoto.” Captions also make your content accessible.
5. Use Transitions
Transitions keep viewers engaged. Try zooms, swipes, or creative hand-over-camera effects between clips.
6. Apply Filters and Adjustments
Enhance your footage with subtle color corrections. Avoid over-editing; let the natural beauty of the destination shine.
7. Final Touches
Check pacing, polish audio, and make sure the Reel is under 90 seconds. Then, export and upload directly to Instagram.
Tips to Make Your Reels Stand Out
Editing is just one part of the process. To maximize impact, focus on creativity and audience engagement.
- Hook in the First 3 Seconds: Start with a wow moment to grab attention immediately.
- Tell a Complete Story: Even in 30 seconds, include a beginning, middle, and end.
- Incorporate Local Culture: Showcase food, music, traditions, or interactions with locals for authenticity.
- Follow Trends but Stay Unique: Use trending sounds or challenges, but add your personal twist to avoid blending in.
- Encourage Interaction: Ask questions in captions like, “Would you try this street food?” or “Which beach would you visit first?”
Common Mistakes to Avoid
Even seasoned creators make mistakes that reduce the effectiveness of their Reels. Watch out for:
- Overusing Effects: Too many filters or transitions can distract from your story.
- Ignoring Audio: Poorly synced clips or irrelevant music reduce engagement.
- Low Quality Footage: Blurry or shaky clips hurt professionalism.
- Overcrowded Reels: Stick to one theme or destination per Reel for clarity.
- No Call-to-Action: Always encourage viewers to like, share, save, or follow.
Optimizing Reels for Maximum Reach
Once your Reel is edited, make sure it reaches as many people as possible:
- Hashtags: Use a mix of broad ones (#TravelReels, #ExploreWithMe) and niche ones (#HiddenTokyo, #ParisEats).
- Captions: Keep them engaging and aligned with your Reel’s theme.
- Thumbnails: Choose or design a cover image that reflects your video’s story.
- Timing: Post when your audience is most active, often mornings or evenings in their time zone.
- Consistency: Posting Reels regularly helps you stay visible in the algorithm.
Tools to Elevate Your Reels Even Further
Beyond Instagram reel makers, you can also use additional tools to enhance your workflow:
- Lightroom Mobile: For quick, professional color grading.
- Unfold: Great for creating cohesive Reel cover designs.
- Mojo: Adds dynamic motion graphics for extra flair.
- Later or Buffer: Schedule and analyze your Reels’ performance.
By combining these tools with your editing process, you’ll streamline your content creation and deliver consistently high-quality results.
Final Thoughts
Travel content is about inspiring others to see the world through your lens. With the power of Instagram Reels, you can bring your journeys to life in a way that feels authentic, creative, and engaging. By shooting intentionally, editing with the right tools, and optimizing for reach, you’ll be able to transform simple travel clips into professional-quality videos that resonate with audiences everywhere.